
Using Native QGIS Tools with PostGIS Layers
This tutorial reviews the process of using native QGIS tools with PostGIS layers and shows how this functionality can be used in an enterprise environment.
What You’ll Learn in this Tutorial
- Execute native QGIS tools with PostGIS layers as input and save the output back into the database.
- Execute QGIS tools with PostGIS layers using the Graphical Modeler.
Prerequisites
- Install the latest QGIS LTR here.
- Access to a PostgreSQL database with the PostGIS extension.
- Download and unzip the tutorial data here.
Introduction
Layers loaded from PostgreSQL work exactly the same as layers that are loaded from Shapefiles, Geopackages, or any other vector format. The following summarized how you can use PostgreSQL layers with QGIS tools.
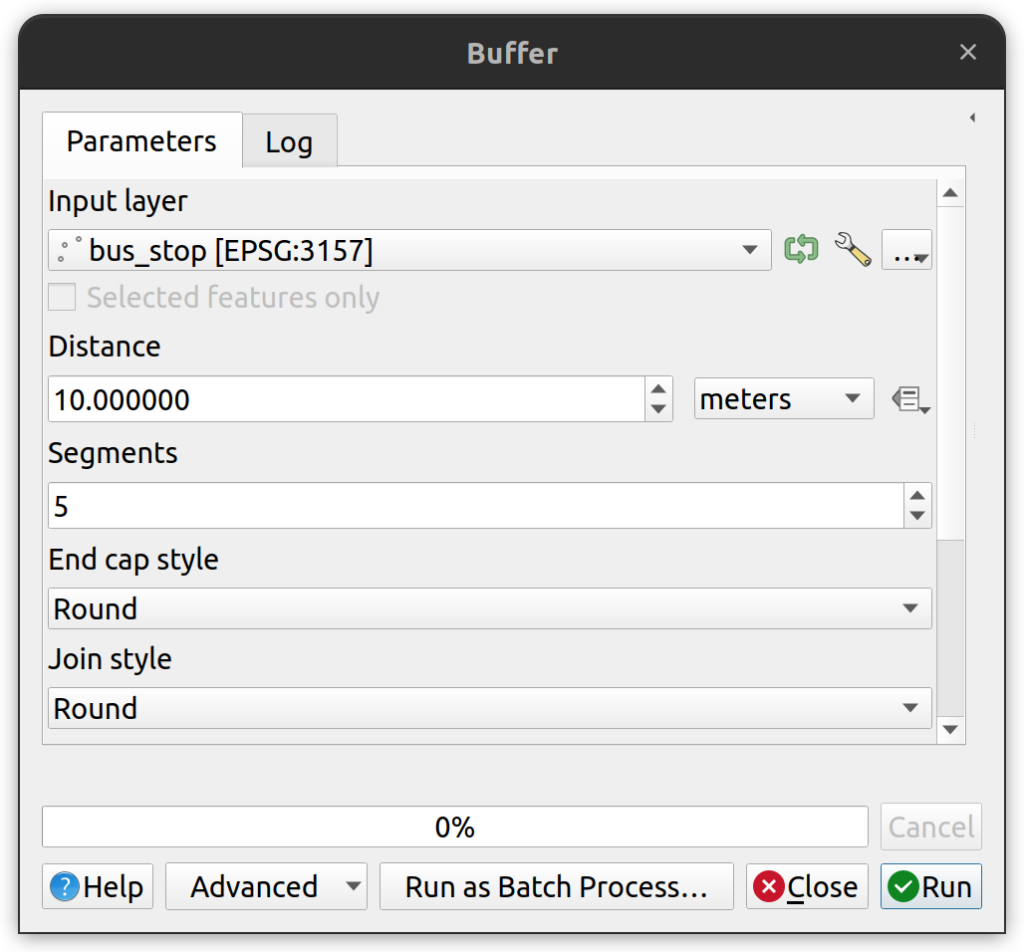
Tool Input. Use any valid spatial table in PostgreSQL as an input layer into a QGIS processing tool. Simply load the layers into QGIS and then execute the tool. In this example, the following screenshot shows the bus_stop layer from the database being used as the input layer in the QGIS Buffer tool.
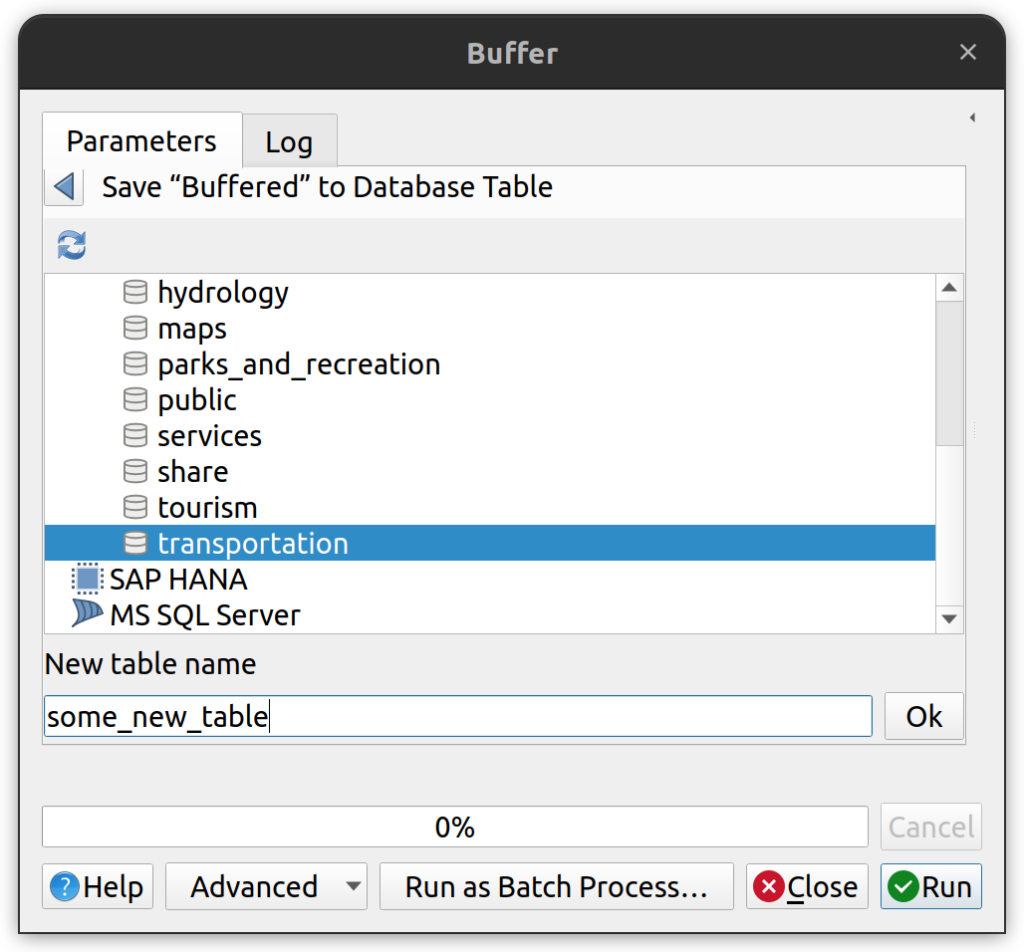
Tool Output. Save an output from any QGIS processing tool to an existing or new PostgreSQL connection. At the bottom of all tools where the user can input the output file name, there is a dropdown menu that offers the option to “Save to database table”. Selecting this option brings up the following dialog box that allows the user to specify the output table name and location in the database.
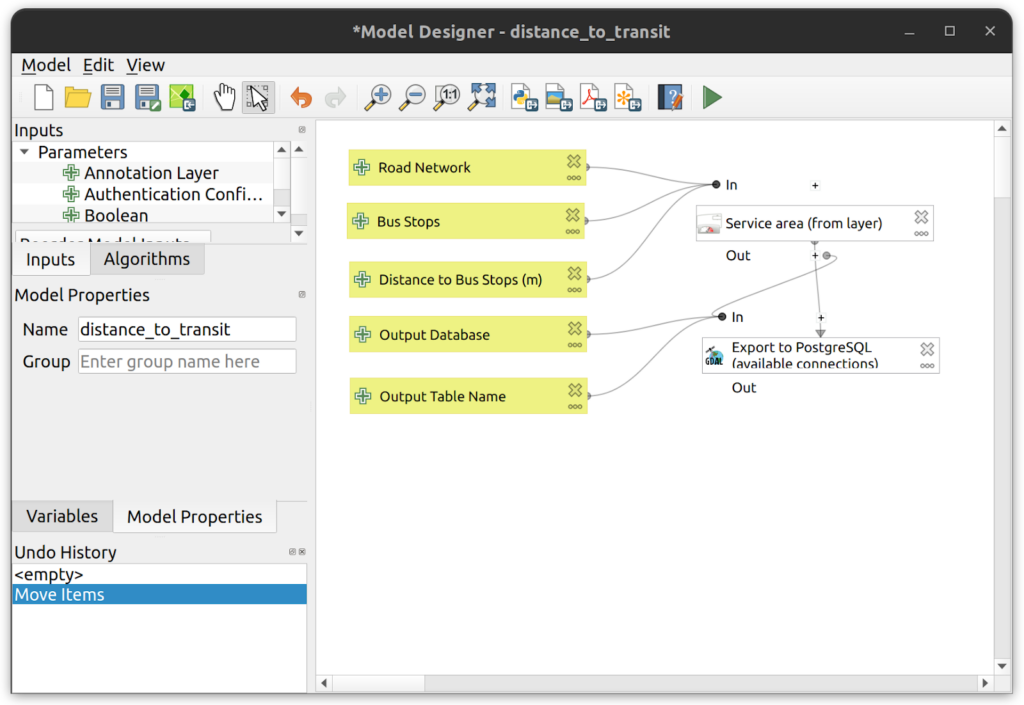
Graphical Modeler. The Graphical Modeler in QGIS gives users the ability to create custom tools that can be saved to the user’s profile or saved to projects. When those projects containing custom tools are saved to the database, they become available to any user within the enterprise environment. Input parameters can be added to models for database connections, schemas, and tables. For example, the screenshot below shows the tool that will be built in this tutorial. It contains a native QGIS processing tool and the model output is exported to PostgreSQL using the GDAL Export to PostgreSQL tool.
Task 1: Walking distance to transit analysis
The standard walking distance to transit is 400m (or ¼ mile). That means that any properties beyond 400m are considered inaccessible to transit. Let’s use this standard distance to do a walking distance to transit analysis. We will use the native QGIS Service area (from layer) tool to produce a 400m service area around bus stops.
1. In QGIS, import the Kamloops street and bus stops layers into PostgreSQL then add the layers to a new QGIS project.
2. Open the Service area (from layer) tool and enter the following parameters:
- Vector layer representing network: street layer
- Path type to calculate: Shortest
- Vector layer with start points: bust_stop
- Travel cost: 400

3. In the Service area (from layer) tool, scroll down to the parameter called “Service area (lines) [optional]” and click in the dropdown and select “Save to Database”. In the database parameters, set the following:
- Expand your training database connection.
- Click on the desired output schema (transportation)
- For New table name, enter distance_to_transit_400m
4. Click Run. The tool will execute and then upload the results to your database.
5. When complete, refresh the transportation schema and observe that the new layer distance_to_transit_400m has been created.
6. Load the distance_to_transit_400m layer and verify that it was produced correctly.
Task 2: PostgreSQL Layers and the Graphical Modeler
In this task you will create a custom QGIS tool to calculate the distance to transport. By creating a tool we can create multiple iterations and test different input distances without having to re-input known parameters.
1. Create a new QGIS project containing the streets and bus_stop layers from PostgreSQL.
2. Open the Graphical Modeler by clicking on the top menu Processing > Graphical Modeler.
3. Add the following inputs:
- Road Network: vector layer input type with geometry type set to Line.
- Bus Stops: vector layer input type with geometry type set to Points.
- Distance to Bus Stops (m): number input type
- Output Database: Connection name input type.
- Output Table Name: string input type.
4. Add the following tools:
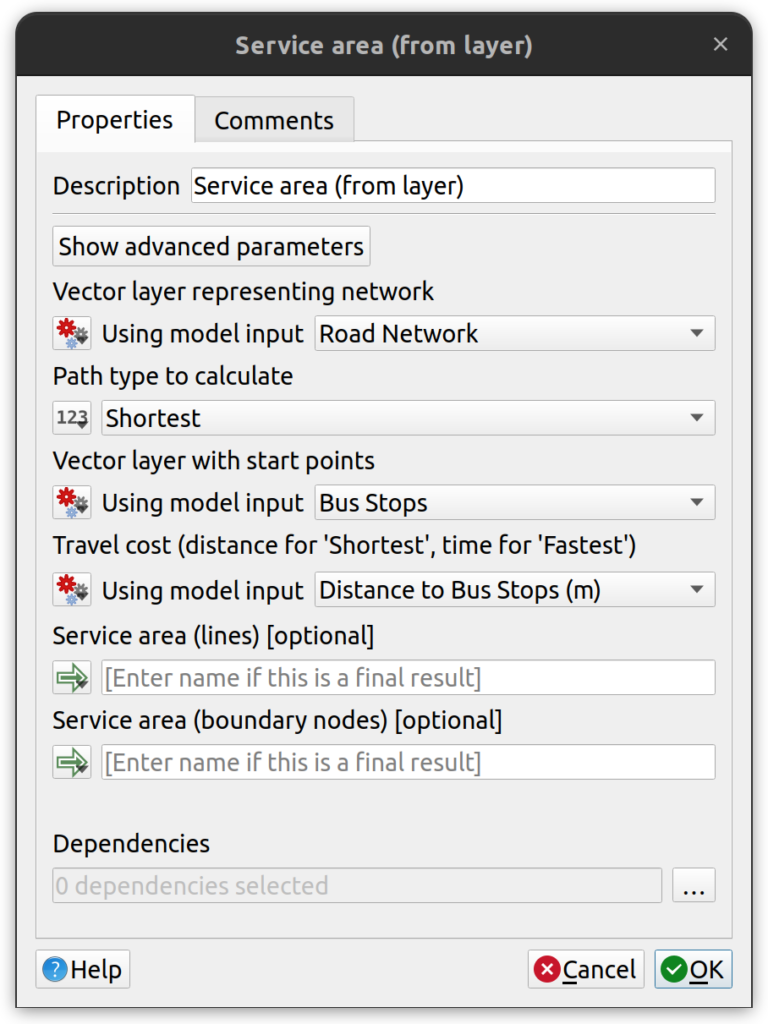
- Add the Service area (from layer) tool with the parameters shown in the screenshot below.
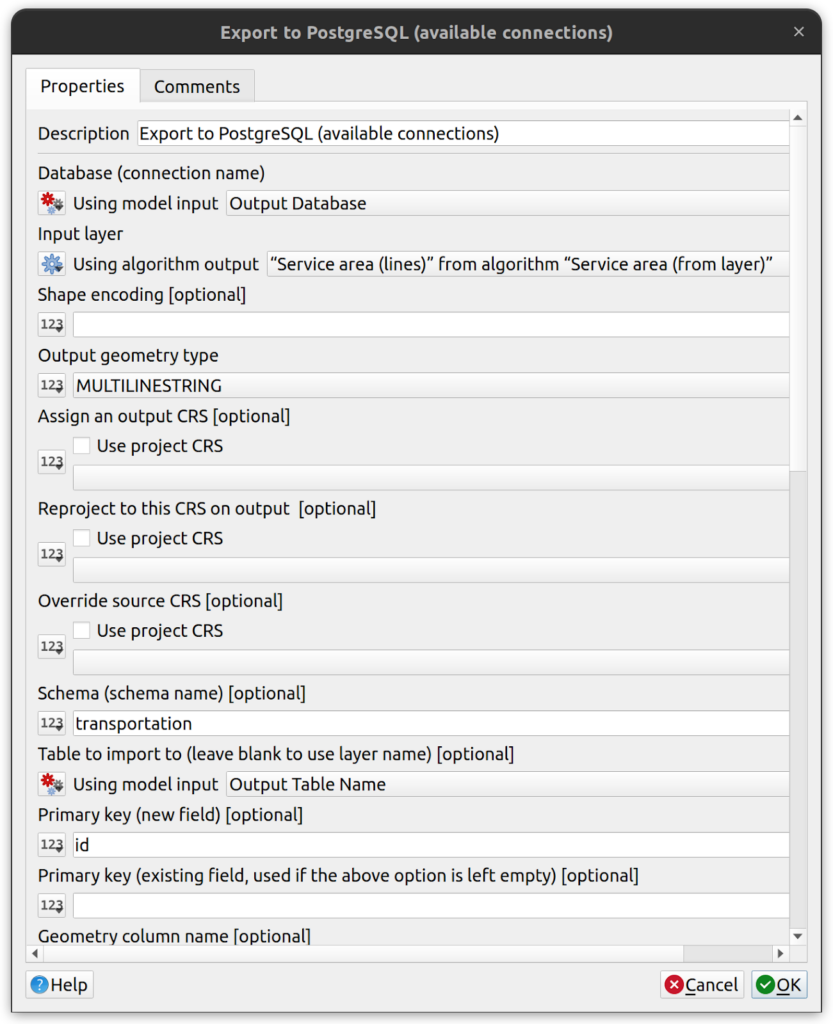
- Add the Export to PostgreSQL (available connections) tool with the parameters shown in the screenshot below.
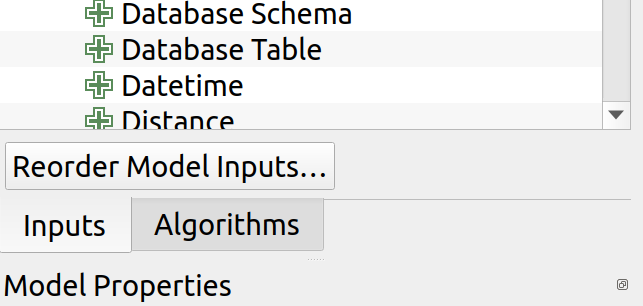
5. Use the Reorder Model Inputs button to change the input order on your new tool.

6. Save your model to the project and save your QGIS project.
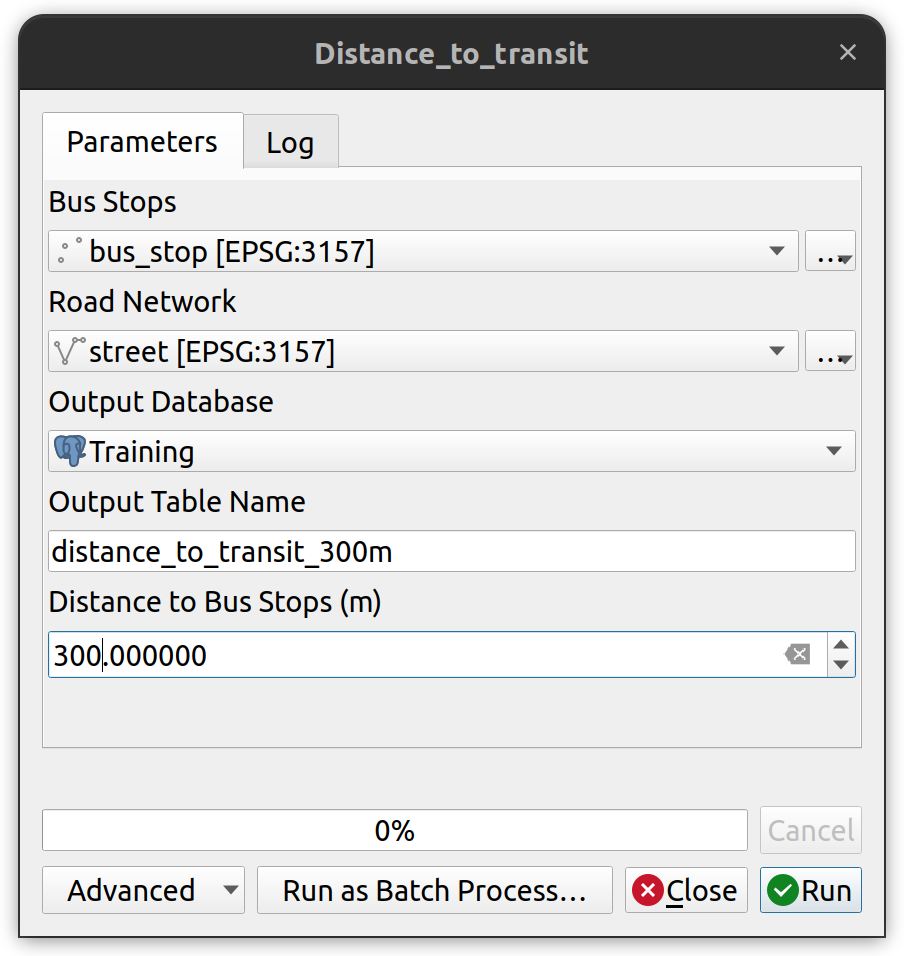
7. When the tool is configured and saved to the project, the analysis should automatically output the results to your database connection. Test the tool by running it with the following parameters.
How can we help?
Contact us today to schedule a free consultation with a member of our team.