
The Layers Panel in LunaMap
Open the Layer panel
- Open the LunaMap map page.
- Click on the hamburger menu in the top-left corner to show the left navbar.
- Click on the Layers icon (second from the top) to open the Layers panel.

Adding a Layer to a Map
- Open the map where the new layer will be added and expand the Layers panel.
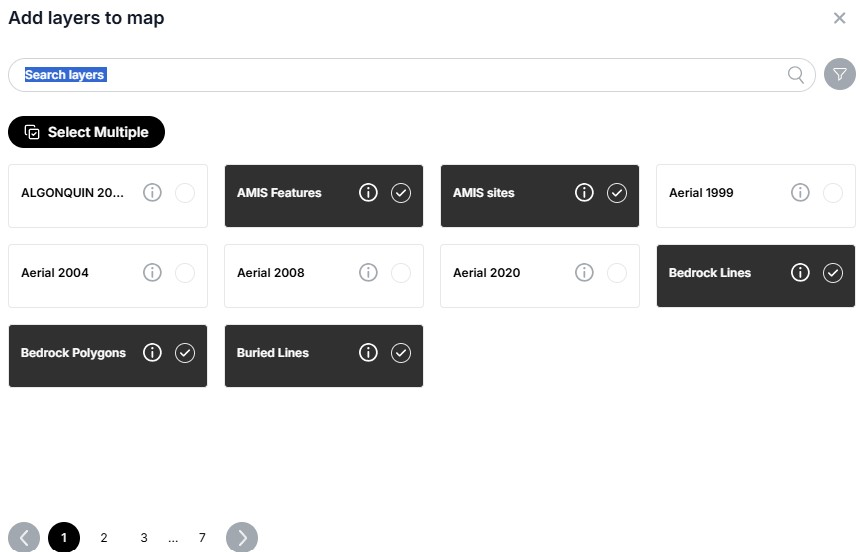
- With the Layers panel open, click on the Add button at the top-right corner of the Layers panel.
- In the Add Layers to Map dialog that appears, locate the layer to be added by navigating through the pages, (2) using the search bar at the top, and/or (3) expanding the Filter menu to sort the layers by category.
- When you have located the layer to add, hover over the right side of the layer card and click the checkbox. This will add the layer to the current map.
- Close the Add Layers to Map window using the X button in the top-right corner.
- The new layer should now be visible on the map.

Changing Layer Z-Order
- The z-order of layers on a map can be changed via the Layers panel.
- Open the Layers panel and locate the layer or layer group that needs to be moved.
- Click on the drag handle of the layer or layer group (six dots icon) and drag it to the desired position.
- Note that users can drag layers into or out of group layers and adjust layer order within group layers.

Layer Tools
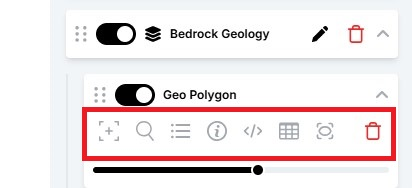
- The Zoom button zooms the map to the layer extent.
- The Search button opens the Search and Zoom tool with the selected layer set as the searchable layer.
- The Legend button expands the layer card to show the legend graphic from Geoserver.
- The Identify button toggles the current layer as active/inactive for the Identify tool. Only a single layer can be active.
- The Metadata button toggles
- The Attributes button toggles the attributes table open/closed for the selected layer.
The Layer Visibility Limit button allows users to set the minimum scale visibility for the layers.
Removing layer from the Map
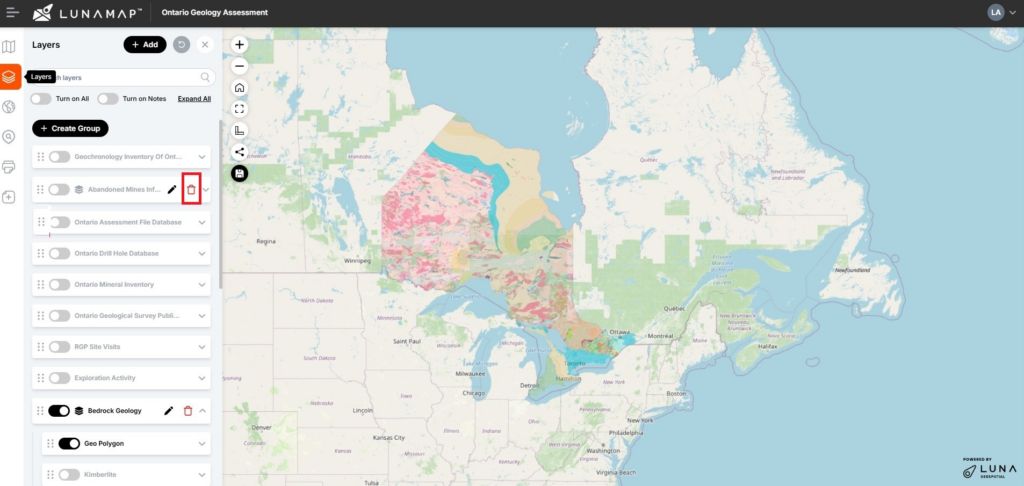
- Locate the layer within the Layers panel that needs to be removed and toggle it on.
- Expand the layer card to reveal the remove layer button (red trash can icon).
- Click on the remove layer button.
- In the confirmation dialog, confirm the removal by clicking on the “Remove Layer” button or click Cancel to abort the operation.
- Alternatively, click on the Add button at the top of the Layers Panel, use the search bar at the top or navigate through the pages at the bottom to locate the layer to be removed, deselect the layer, and confirm the action in the confirmation dialog.
Creating Layer Groups
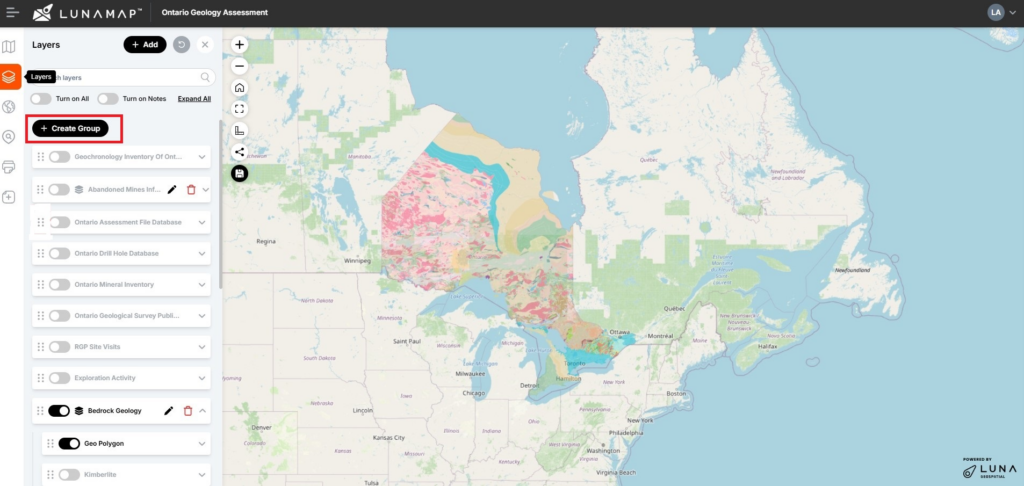
Layers can be grouped in the Layers panel and either toggled on/off together or set to be mutually exclusive so that only one layer can be on within the group (handy for basemap layers). To create a Layer Group, follow these instructions.
- Click on the Create Group button in the Layers panel.
- In the Create New Group dialogue box enter the following details:
- Provide a Name for the layer group.
- Add a description for the layer group.
- Click the toggle to make the layer group mutually exclusive.
- Click on the Create button to finish the process or the Cancel button to abort the group creation process.
- To populate the group, drag and drop the layers of interest into the group.
How can we help?
Contact us today to schedule a free consultation with a member of our team.