
Publish Rasters with Geoserver
This tutorial explains how to publish rasters in Geoserver, from upload to preview. See our other tutorials to learn how to optimize and style rasters for Geoserver.
Introduction
Before publishing rasters with Geoserver, the optimized data must be transferred to the server on which Geoserver resides. The transfer method will vary depending on the server configuration, but most often an SFTP connection will be used to transfer files using an application like FileZilla. Once the raster layer is on the server, first create a raster store and then publish the raster from that store. This process is explained in the following sections.
Step 1: Create a GeoTIFF Store
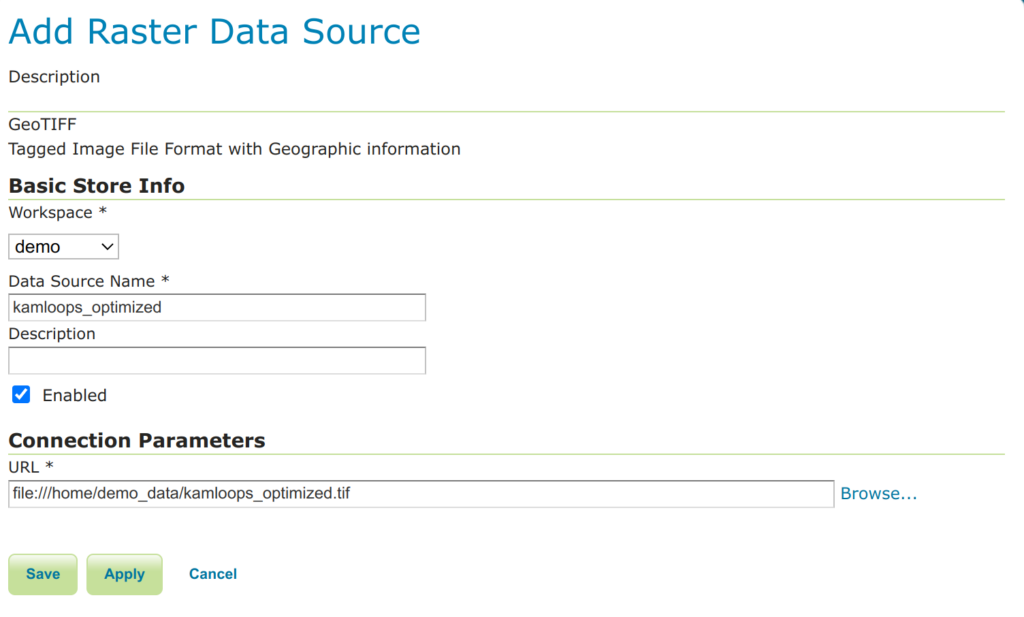
- In Geoserver, click on Data > Stores.
- Click Add new Store at the top of the page.
- Under Raster Data Sources, click GeoTIFF.
- On the Add Raster Data Source page, enter the following parameters:
- Workspace: Select the target workspace from the Dropdown.
- Connection Parameters: click Browse to locate the file on the server. All uploaded rasters should be in the Geoserver data directory in a folder called “uploads”.
- Data Source Name: copy the name of the raster from the Connection Parameters section to the Data Source Name. At this point it is possible to rename the store name according to a predefined naming convention – hence, enter whatever you wish in this section.
- Description: provide a description (optional).
- Click Save.
- Click Publish on a layer and then proceed to the next section.

Step 2: Publish a Raster Layer
Continued from the previous section…
- On the Edit Layer page, at minimum, set the following parameters:
- Name: use the default or change as desired.
- Title: use the default or change as desired.
- Coordinate Reference Systems: this can be modified as needed. It is possible to reproject a layer to another CRS, if required.
- Native Bounding Box: This value is automatically generated for the defined raster SRS, but regenerate if SRS settings are changed using the “Computer from data” link.
- Lat/Lon Bounding Box: This value is automatically generated.
- Click Save.
- To check if the published layer works as expected, click on Data > Layer Preview.
- Locate the new Layer in the list (there is also a search/filter tool) and click on OpenLayers. A new tab will open containing a WMS layer preview map.
How can we help?
Contact us today to schedule a free consultation with a member of our team.