
Publish PostGIS Layers in Geoserver
This tutorial explains how to publish PostGIS layers in Geoserver. It is important to note that when creating a PostGIS store, it is created for the entire schema. If multiple layers are to be shared from a single schema, one only needs to create a single store pointing to the schema. If, however, one needs to share layers stored in multiple schemas, a store will need to be created for each schema.
For security reasons, if the layers shared will only be read through Geoserver and not edited, it is best to create stores using a read-only DB username and password.
Part 1. Create a PostGIS Store in Geoserver
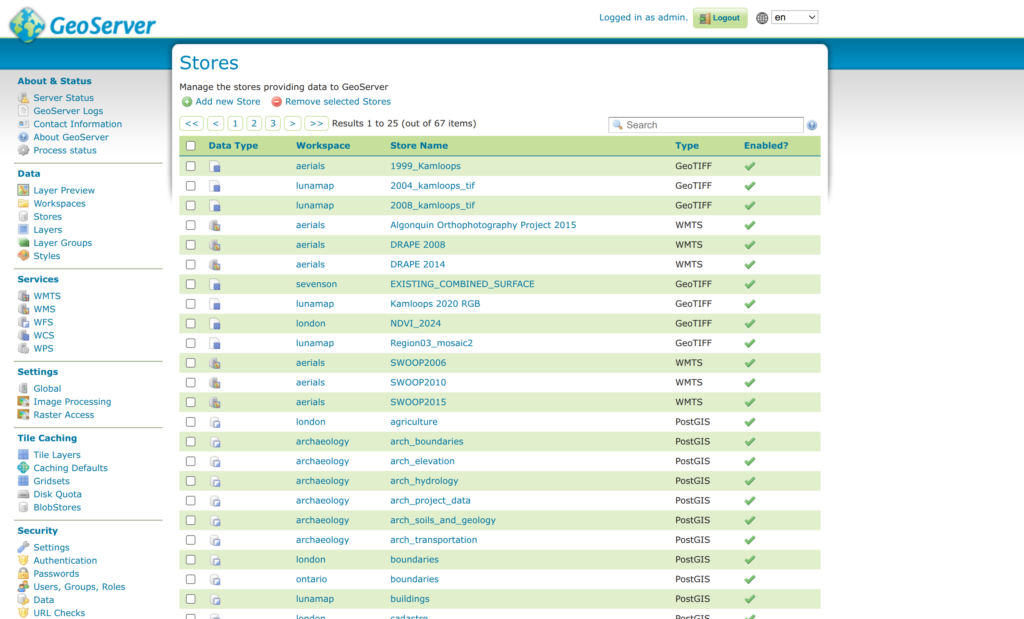
1. In Geoserver, click on Data > Stores.
2. Click Add new Store at the top of the page.
3. Under Vector Data Sources, click PostGIS (not PostGIS (JNDI)).
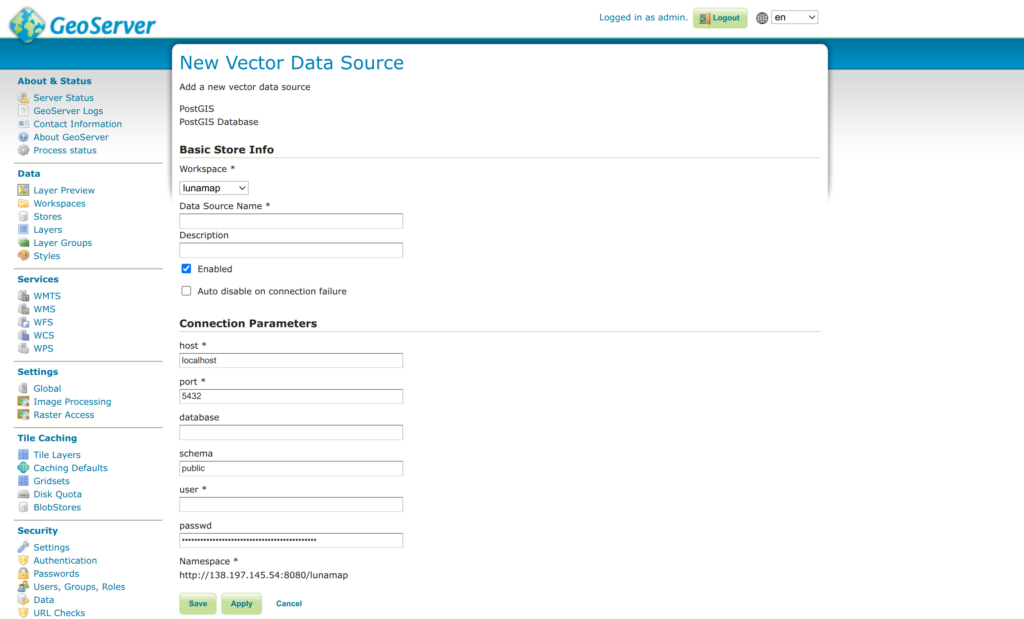
4. On the New Vector Data Source page, enter the following parameters:
- Workspace: Select the target workspace from the Dropdown.
- Data Source Name: name the workspace (lowercase_snake_case is best, though not absolutely required).
- Description: provide a description (optional)
- Host: enter the host URL (minus https://). For example, geo.lunageo.com. If your Geoserver is on the same server as your database server, you can enter “localhost” here.
- Port: enter the port for your server or use default value if correct.
- Database: enter the database name (e.g. gis).
- Schema: Enter the schema name. Do not leave the default “public” schema here unless you have data stored in your public schema that you wish to share.
- Username: enter the database username, preferably a read-only username if write privileges are not required.
- Password: enter the database password associated with the username.
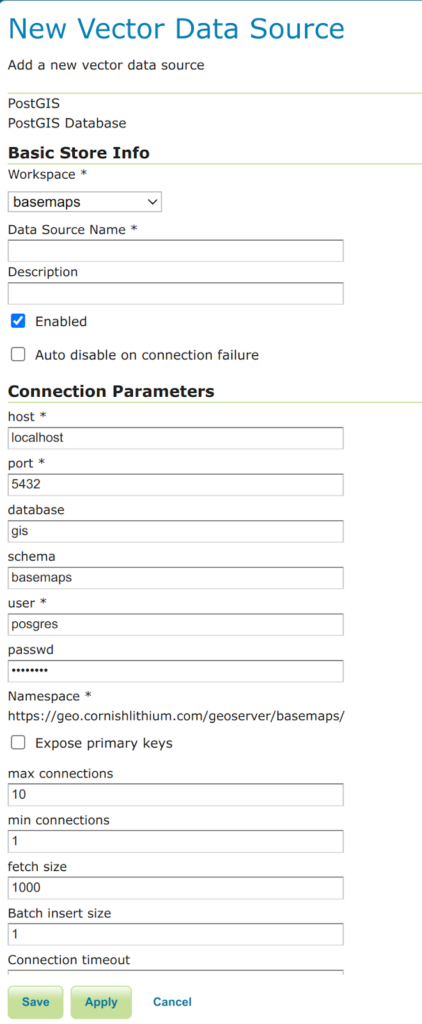
- Expost Primary Keys: helpful if you plan to refer to features by primary keys (e.g. the id field).
- Leave all other values default.
- Press Save.
5. If the database connection was set up properly, a list of layers should appear.
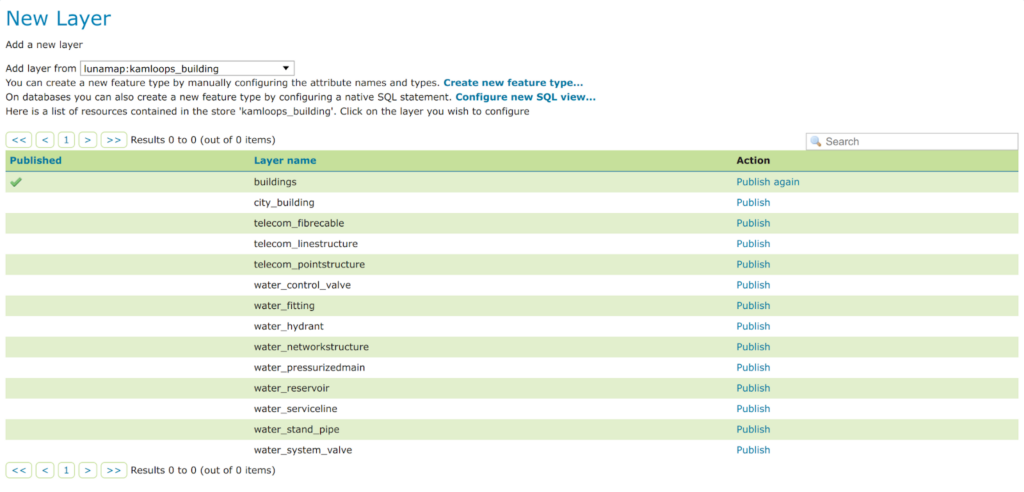
6. Click Publish on a layer you wish to publish, then proceed to the next section.
Part 2. Publish a PostGIS Layer
Continuing from Part 1, you will now configure the layer that was selected to be published.
1. On the Edit Layer page, at minimum, set the following parameters:
- Name: use the default or change as desired.
- Title: use the default or change as desired.
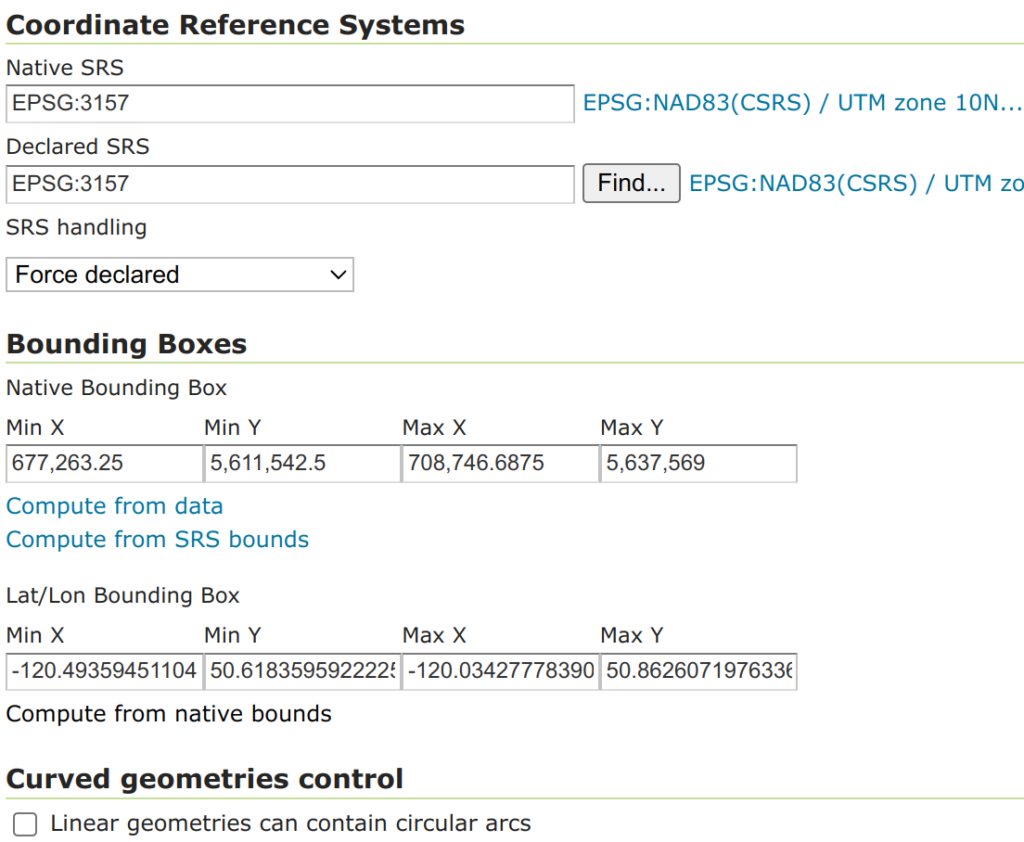
- Coordinate Reference Systems: this can be modified as needed. It is possible to reproject a layer to another CRS, if required.
- Native Bounding Box: Click Compute from data.
- Lat/Lon Bounding Box: Click Compute from native bounds.

2. Click Save.
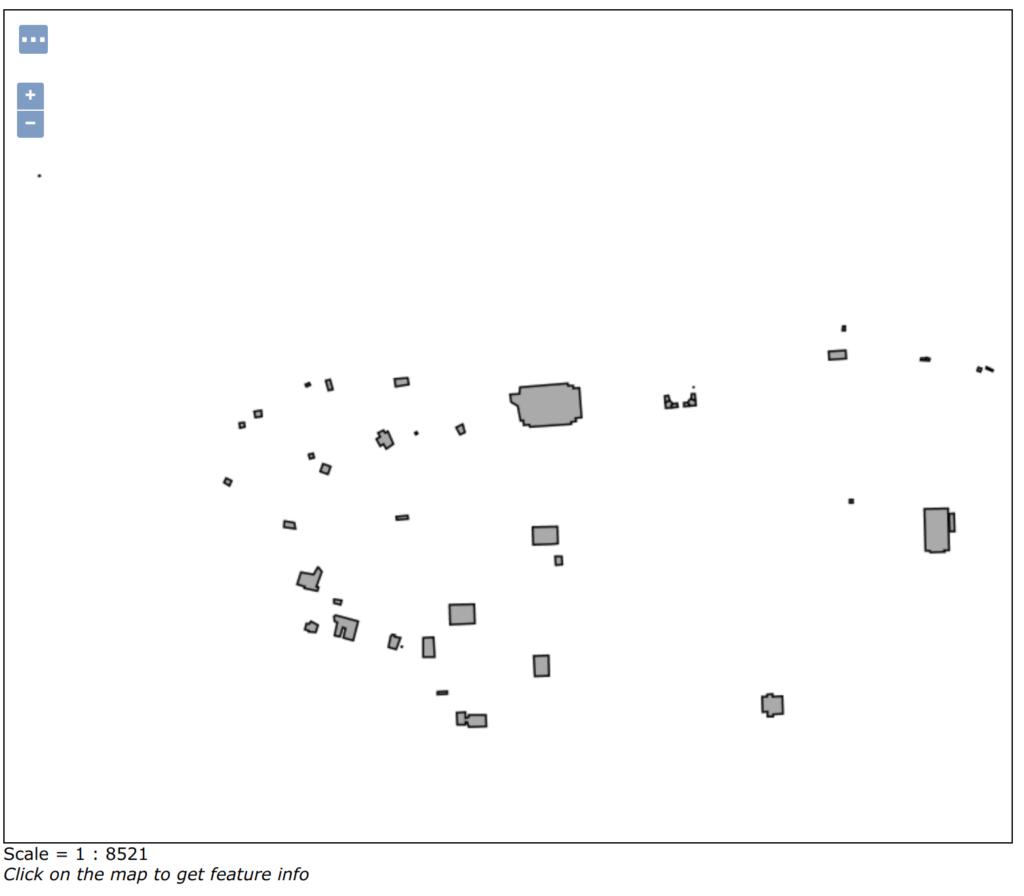
3. To check if the published layer works as expected, click on Data > Layer Preview
4. Locate the new Layer in the list (there is also a search tool) and click on the OpenLayers link. A new tab will open containing a WMS layer preview map.
5. Notice that the style applied to the layer is a default style. To create and apply a custom style, see Style Vector Layers in Geoserver.
Part 3. Publish PostGIS Layers from an Existing Store
Since a PostGIS Store can contain multiple layers, after publishing the initial layer, you may need to publish additional layers. The instructions below explain how to accomplish this.
1. In Geoserver, click on Data > Layers
2. At the top of the Layer page, click on Add a new layer.
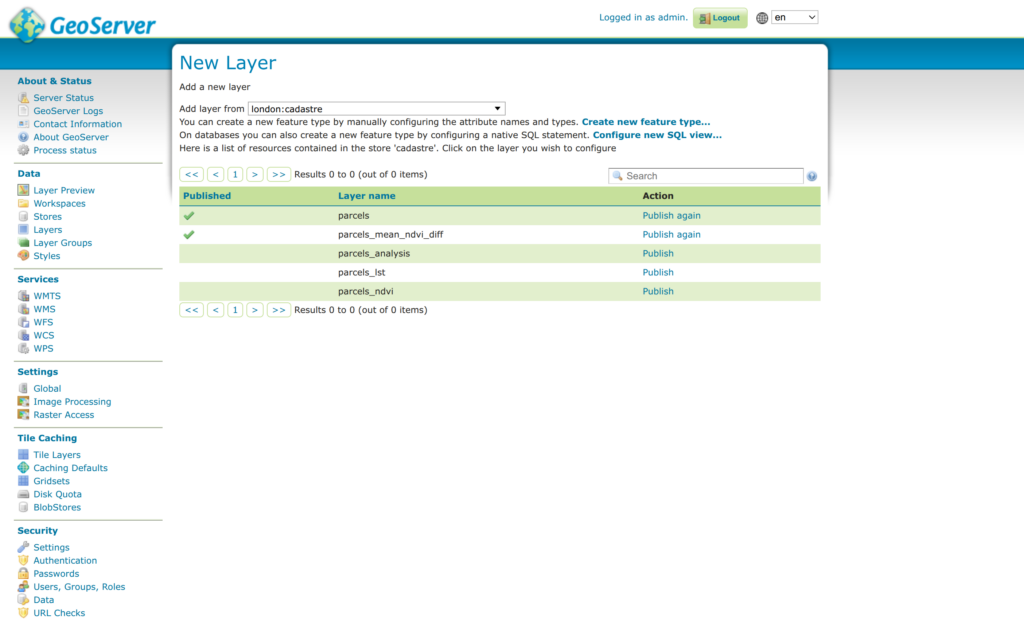
3. Select the desired Store from the “Add layer from” dropdown menu. Select the PostGIS store created in the previous section.
4. Click the Publish link beside the PostGIS layer you wish to publish.
5. Publish the layer by following the instructions in Part 2 above.
How can we help?
Contact us today to schedule a free consultation with a member of our team.