
Publish Geopackage Vector Layers in Geoserver
Publishing layers from a Geopackage is very similar to publishing from a PostGIS store because one can publish multiple layers from a single Geopackage.
Part 1: Create a Geopackage Store
1. In Geoserver, click on Data > Stores.
2. Click Add new Store at the top of the page.
3. Under Vector Data Sources, click Geopackage.
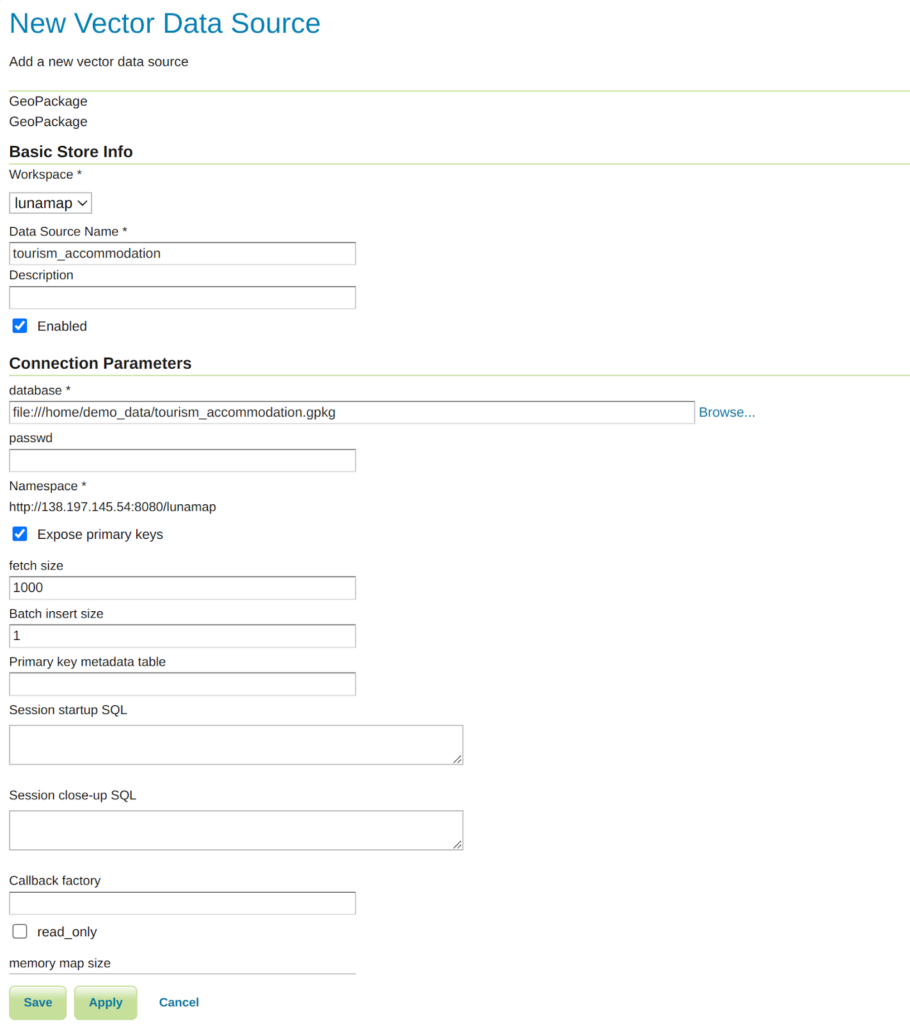
4. On the New Vector Data Source page, enter the following parameters:
- Workspace: Select the target workspace from the Dropdown.
- Data Source Name: name the workspace (lowercase_snake_case is best, though not absolutely required).
- Description: provide a description (optional).
- Database: navigate to the location where the geopackage is stored on the server, and select the .gpkg file.
- Leave all other values default.
- Press Save.
Click Publish on a layer and then proceed to the next section.
Part 2: Publish layers from the Geopackage Store
There are some important things to know about publishing layers from a Geopackage Store.
- When first creating a geopackage store, the user will be presented with a list of layers to publish. Each layer has to be published individually.
- It is possible to publish multiple layers from a single geopackage store. When adding a new layer, simply select a previously created Geopackage store as the source and select another layer to publish.
1. After creating the Geopackage store (Part 1), click Publish on one layer in the list.
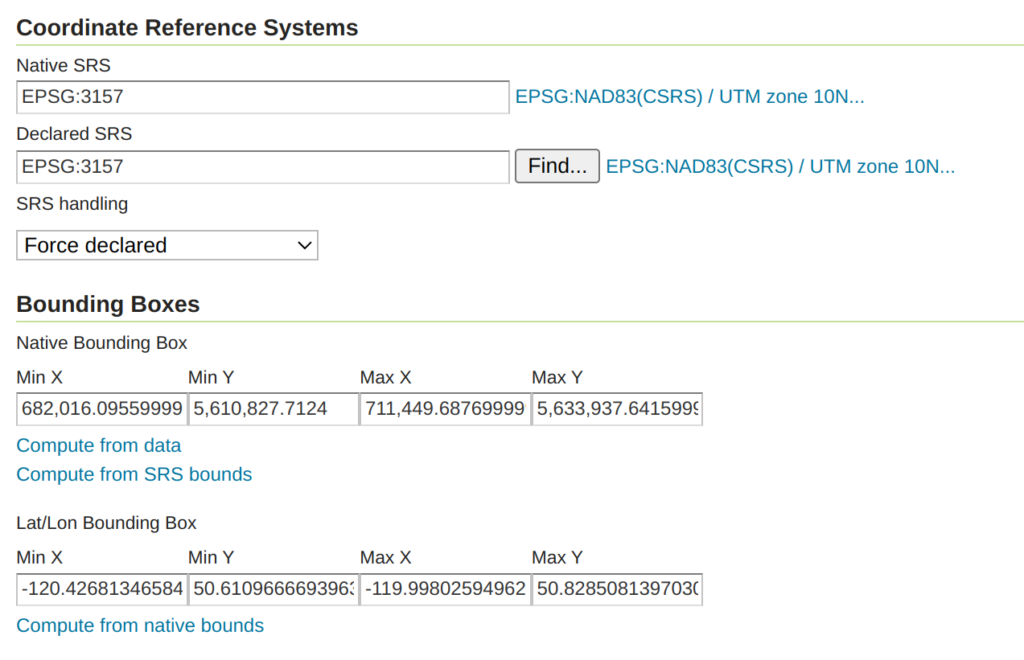
2. On the Edit Layer page, at minimum, set the following parameters:
- Name: use the default or change as desired.
- Title: use the default or change as desired.
- Coordinate Reference Systems: this can be modified as needed. It is possible to reproject a layer to another CRS, if required.
- Native Bounding Box: Click Compute from data.
- Lat/Lon Bounding Box: Click Compute from native bounds.
- Click Save.

3. To check if the published layer works as expected, click on Data > Layer Preview
4. on the Layer Preview page, locate the new layer in the list (there is also a search/filter tool) and click on OpenLayers. A new tab will open containing a WMS layer preview map.
5. Notice that the style applied to the layer is a default style. To create and apply a custom style, see the tutorial entitled Style a Vector Layer in Geoserver.
How can we help?
Contact us today to schedule a free consultation with a member of our team.