
PostgreSQL Trigger Functions
PostgreSQL trigger functions can be used to execute predefined routines on database objects. For example, trigger functions are often used to populate metadata fields automatically, such as a created_by field that requires the username of the user who created the row. With PostGIS, trigger functions can also be used to execute spatial functions, such as st_area or st_length. Almost any valid SQL SELECT statement can be used as part of a trigger function.
What You’ll Learn in this Tutorial
- How to create a trigger functions and triggers in PostgreSQL.
- How to use trigger functions with PostgreSQL and PostGIS functions.
Prerequisites
- Install the latest QGIS LTR here.
- Access to a database where you have permission to create a schema, table, trigger function, and other objects.
Important Terms
- Trigger Function. A trigger function is the actual function that is executed when a trigger is fired. Trigger functions are objects of a schema and must be called just like a table, with schema_name.table_name. On its own, triggers do not do anything in the DB. They are only active when fired by a trigger.
- Trigger. Triggers are objects associated with tables. They fire the specified trigger functions if the specified DML (Data Manipulation Language) commands are made. For example, a trigger may fire if the user does an INSERT command. In a typical scenario, a trigger fires a trigger function that changes something in a table.
Trigger Function Example
Step 1: Create a test schema
In a training PostgreSQL database, create a schema called trigger_function_tutorial. This can be done by executing the following SQL or by using the Browser Panel in QGIS.
CREATE SCHEMA trigger_function_tutorial;Step 2: Create the table
Execute the statement below to create the test_layer table in the schema trigger_function_tutorial.
CREATE TABLE trigger_function_tutorial.test_layer (
id serial primary key,
geom geometry(MultiPolygon, 3857),
centre_northing decimal,
centre_easting decimal,
centre_latitude decimal,
centre_longitude decimal,
centre_latlong_dms varchar,
area_ha decimal,
date_created timestamp with time zone DEFAULT now(),
created_by character varying DEFAULT "current_user"(),
date_modified timestamp with time zone,
modified_by character varying
);
Step 3: Create the trigger function
Execute the SQL statement below to create the trigger function. Note that this trigger function will populate a number of different columns.
CREATE FUNCTION trigger_function_tutorial.tutorial_trigger_function() RETURNS trigger AS $$

BEGIN

NEW.centre_northing = round(st_y(st_centroid(NEW.geom))::numeric,2);
NEW.centre_easting = round(st_x(st_centroid(NEW.geom))::numeric,2);
NEW.centre_latitude = round(st_y(st_centroid(st_transform(NEW.geom,4326)))::numeric,6);
NEW.centre_longitude = round(st_x(st_centroid(st_transform(NEW.geom,4326)))::numeric,6);
NEW.centre_latlong_dms = ST_AsLatLonText(st_centroid(st_transform(NEW.geom,4326)));
NEW.area_ha = st_area(NEW.geom)/10000;
NEW.date_modified = now();
NEW.modified_by = "current_user"();

 RETURN NEW;
END;

$$ language plpgsql;
Step 4: Create the trigger function
Execute the SQL statement below to create the trigger. Note that the trigger will be executed BEFORE INSERT OR UPDATE on EACH ROW.
CREATE TRIGGER test_trigger
 BEFORE INSERT OR UPDATE
 ON trigger_function_tutorial.test_layer
 FOR EACH ROW
 EXECUTE PROCEDURE trigger_function_tutorial.tutorial_trigger_function();
Step 5: Test the Trigger Function
1. Create a new QGIS project and load the layer trigger_function_tutorial.test_layer over an OSM basemap.
2. Zoom into New York City.
3. Toggle editing on the layer and digitize a polygon.
4. Press save on the editing toolbar and toggle editing off.
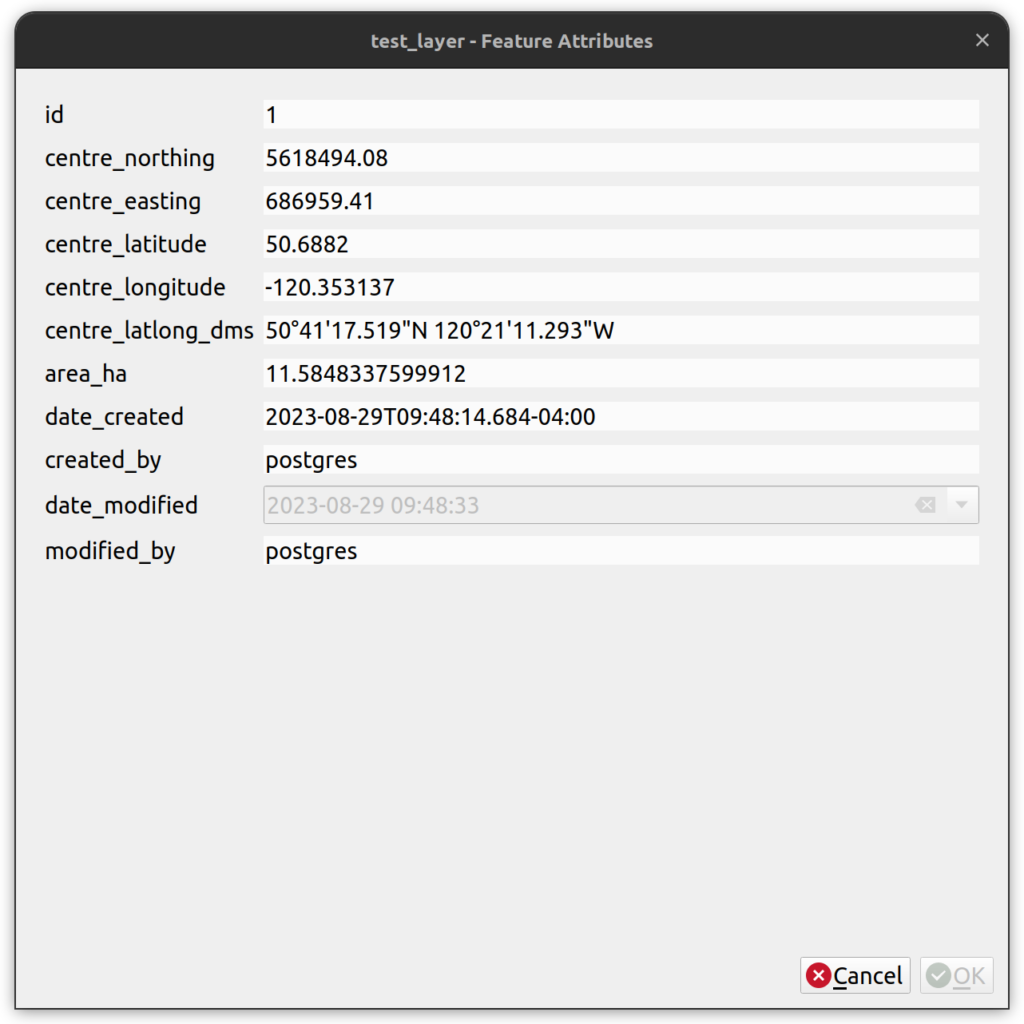
5. Use the Identify tool to see the polygon attributes.
6. You should see all the fields populated, similar to the image below.

How can we help?
Contact us today to schedule a free consultation with a member of our team.